This is the third post in our series of implementing Adobe Analytics and Adobe Target into this WordPress blog through the Adobe Web SDK. In the previous posts, we first built a custom data layer and then integrated Adobe Analytics through the Web SDK. In this post, we want to go even further and try to build a recommendation engine based on Adobe Target, again with Web SDK for the frontend.
To achieve that, we need to go through a few steps:
- Extend the current data layer with more meta data fields
- Send those additional fields to Adobe Target through the Web SDK
- Enable Adobe Target in the Web SDK Datastream
- Setup recommendations in Adobe Target
We can build on our previous post to achieve most of those points. Let’s get started right away!
Sending data to Adobe Target through Adobe Web SDK
To allow any meaningful recommendations, we need to send meta information about the current page or post from the frontend to Adobe Target. We have created a data layer for WordPress before, so we will just extend what has already been created.
Specifically, we want to add those pieces of information:
- Post title (in addition to the already existing page title)
- Permalink of the post or page
- Excerpt of the posts
- Publication status of the pages or posts
- Thumbnail URL of the posts
- The post categories and tags
All of those are going to be used to either display the recommendations or create the catalog of recommendation items, more on that later. The data layer code to gather this information now looks like this:
<script>
	var dhl_utf_dataLayer = {
		page:{
			id:<?php echo(get_queried_object_id()) ?>,
			title:"<?php echo(wp_title()); ?>",
			post_title:"<?php echo(get_the_title()); ?>",
			permalink:"<?php echo(the_permalink()); ?>",
			type:"<?php echo(get_post_type()); ?>",
			excerpt:"<?php echo(wp_strip_all_tags(get_the_excerpt())); ?>",
			status:"<?php echo(get_post_status()); ?>",
			attributes:<?php
				$attributes = array();
				foreach (get_the_category() as $category){
					array_push($attributes,"t=Category;n=".$category->name);
				}
				if(is_array(get_the_tags())){
					foreach (get_the_tags() as $tag){
						array_push($attributes,"t=Tag;n=".$tag->name);
					}
				}
				echo(json_encode($attributes));
			?>,
			thumbnailURL: "<?php echo(get_the_post_thumbnail_url()); ?>",
			categories: <?php echo(json_encode(array_column(get_the_category(), "name"))); ?>,
			tags: <?php echo(is_array(get_the_tags())?json_encode(array_column(get_the_tags(), "name")):"[]") ?>
		}
	}
</script>
You can refer to the first post of this series to find out how we bring this to the frontend of WordPress. For those new data layer fields, we can use Data Elements in Adobe Launch to collect the information as in the second post of this series.
To give this information to Adobe Target we use the Data field of the Web SDK Extension’s Send event Action like this:
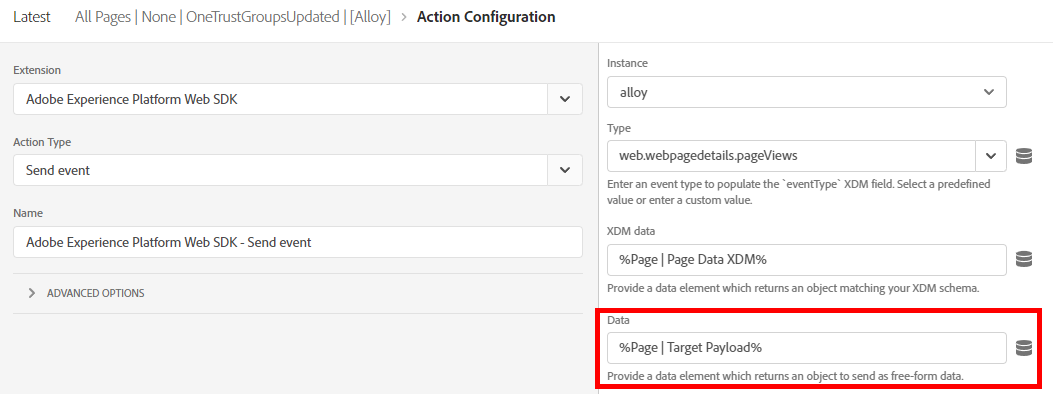
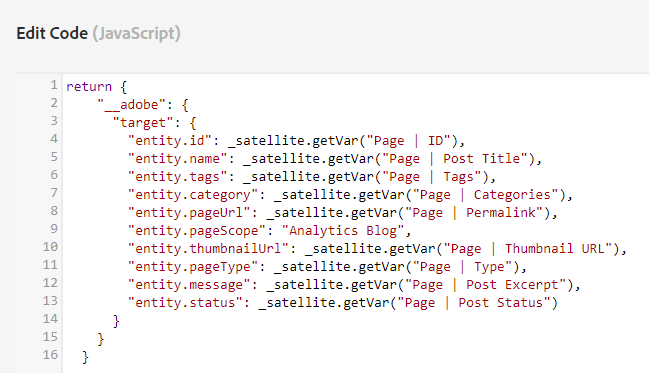
We are using a Custom Code Data Element to provide this information because Adobe Launch does not yet have a native object Data Element Type (which it really should have for tasks like this!) The code of this Data Element is pretty straight forward, as it just puts the Data Element values under the keys that Adobe expects for Adobe Target data:
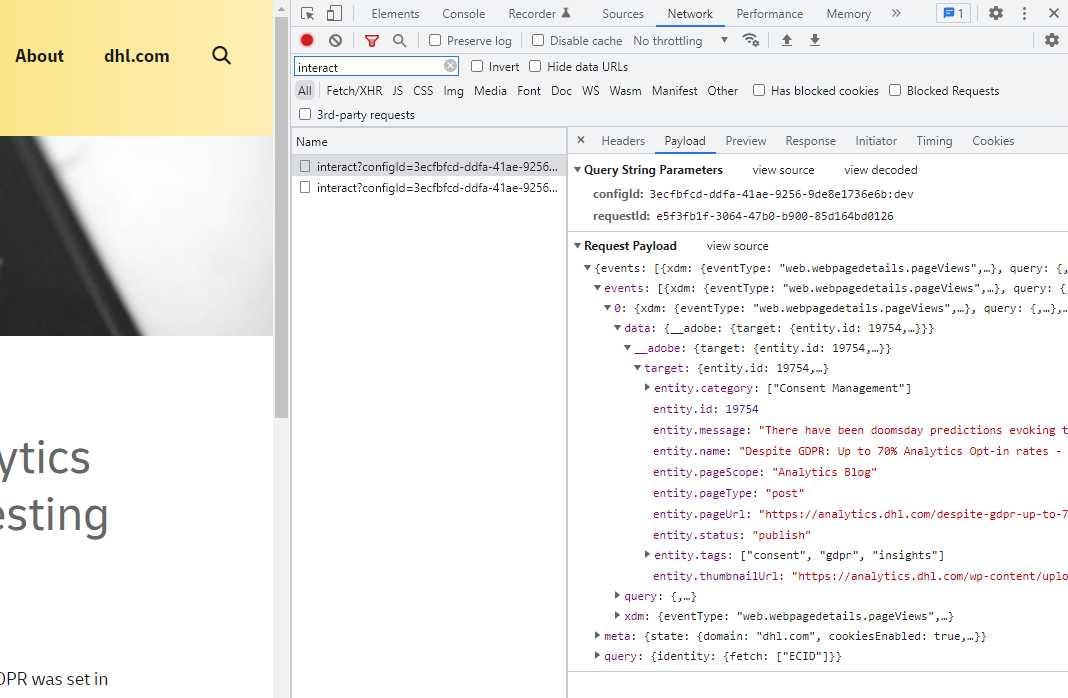
Once everything is saved and built, we can already see the payload in the data section of the Web SDK requests. Make sure to also enable Decision Rendering in your Web SDK events! It looks like this in the frontend:
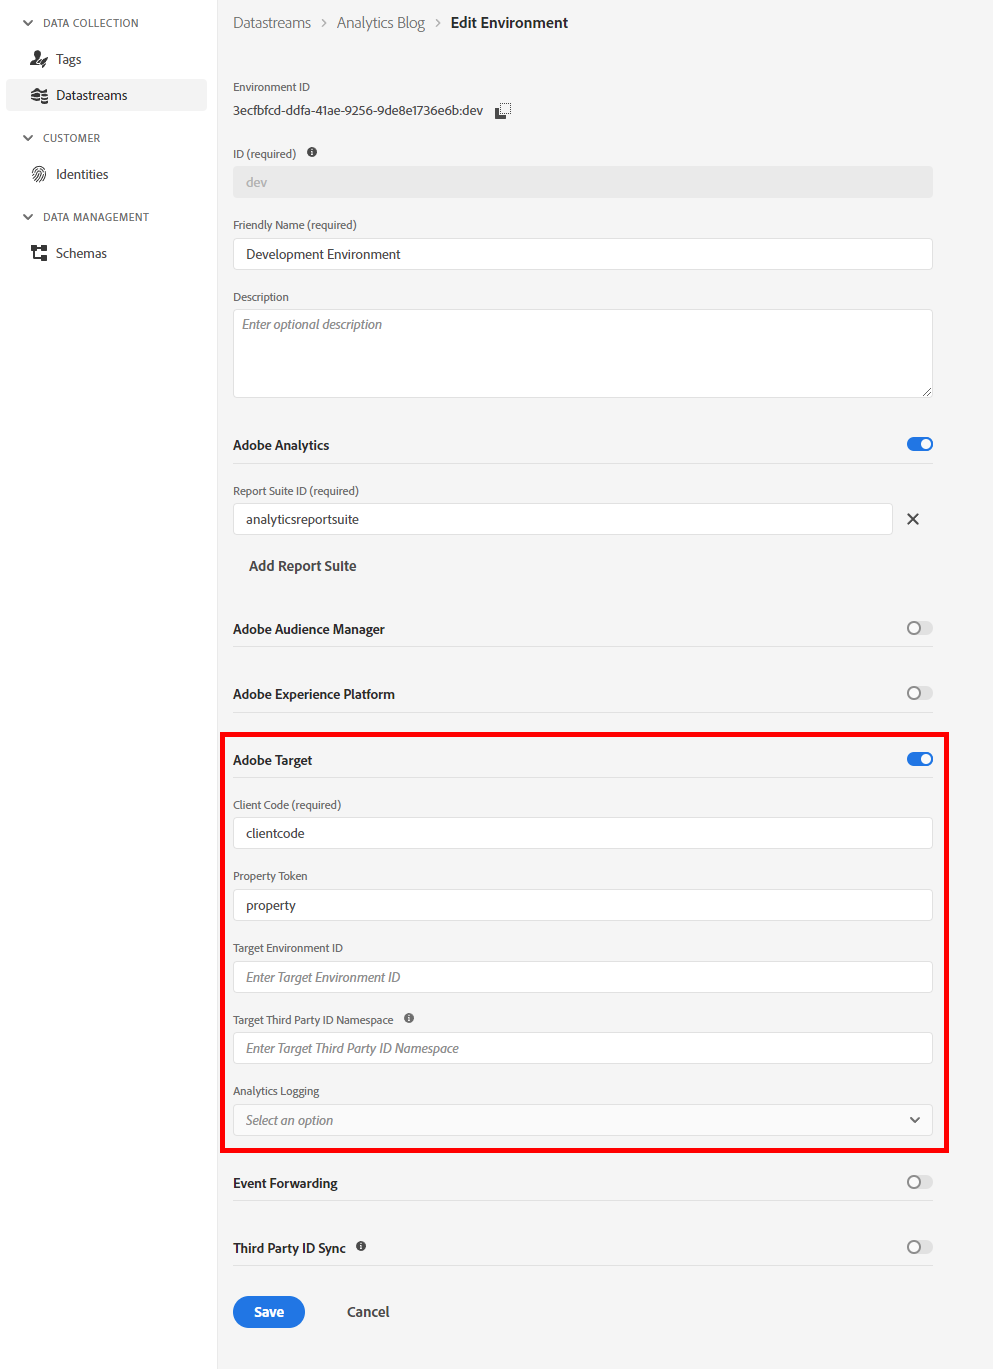
The only thing left in Launch is to enable Adobe Target in the Datastream configuration. All you need to do is flip the toggle for Adobe Target, fill in your Target details, and you’re good to go!
Now Adobe Target will receive all the requests from the frontend through Web SDK. We can now start building our Recommendations Activity!
Building a basic Recommendation Activity in Adobe Target
With all the data we send to Adobe Target we automatically start building a product catalog that contains the pages and posts of this blog. For example, a single post appears like this:

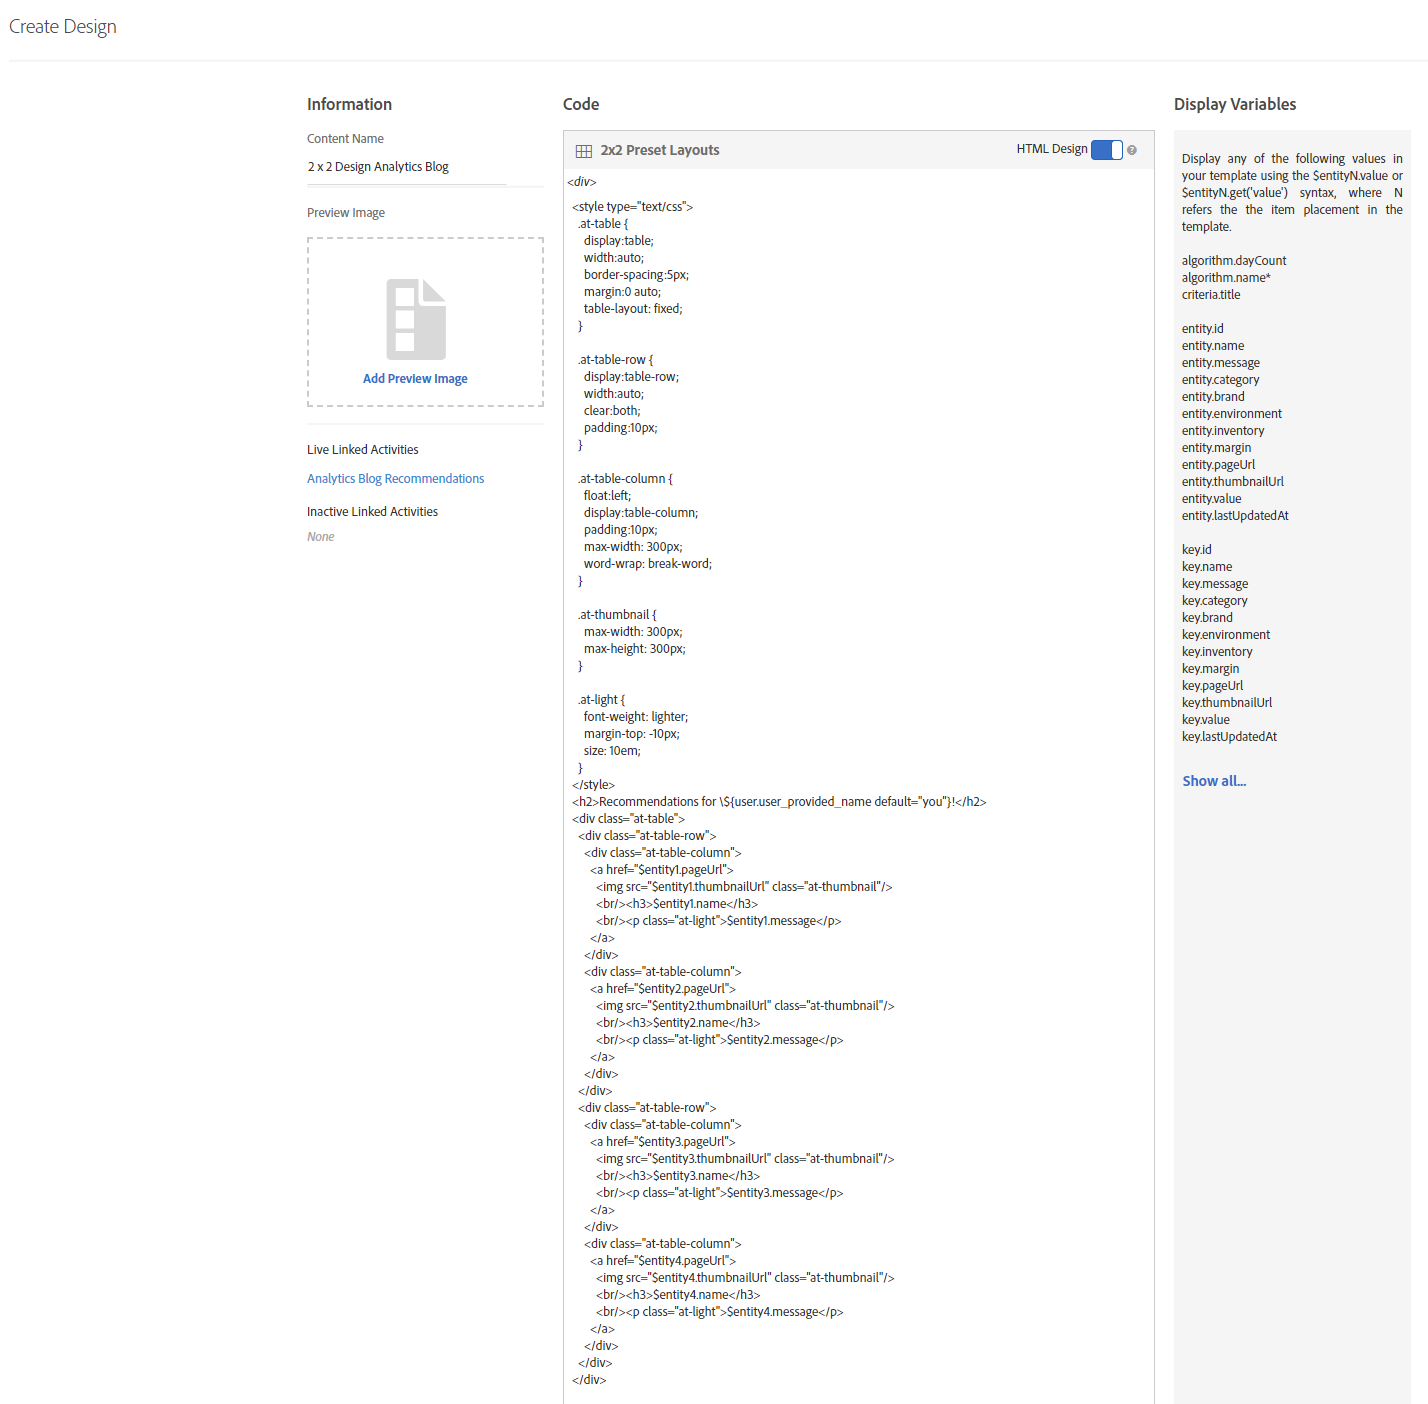
We are using the meta data defined above to build a catalog of only the posts on this nice, little blog. This is super quick from a saved catalog search. Next, we want to customize two of the template Designs (which define how a recommendation will be displayed in the frontend). We customized the 2×2 and 3×1 templates by removing the monetary value, which has no meaning in our context:
Using the Visual Composer, we can now insert those Recommendations right between the end of a post and the beginning of the comment section. The Activity QA shows quite nicely how this is displayed:
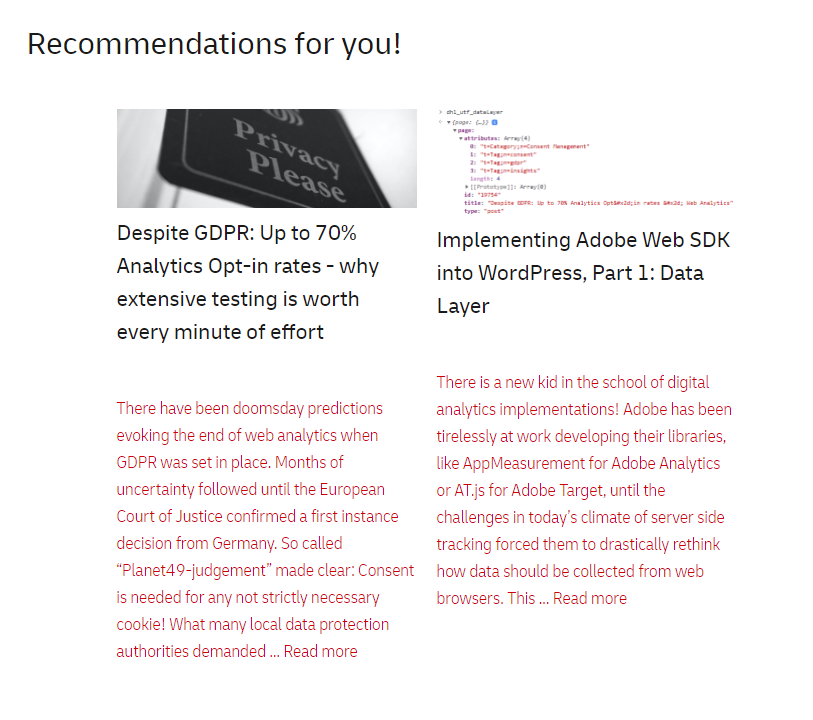
That looks amazing! As you can probably see below this post, we are currently using simple Recommendation Criteria to simply show the most viewed posts on this blog. We may extend or experiment with this in the future, but it works quite nicely already.
Stay tuned for the next post, where we are going to use Adobe Target for some juicy personalization!

Fromer practice Lead Analytics at DHL with more than a decade of experience in Digital Analytics.
Most know for his analytics blog https://www.fullstackanalyst.io/
Hi,
Can you please put up a blog on how to implement Target via Web SDK on a SPA (React)